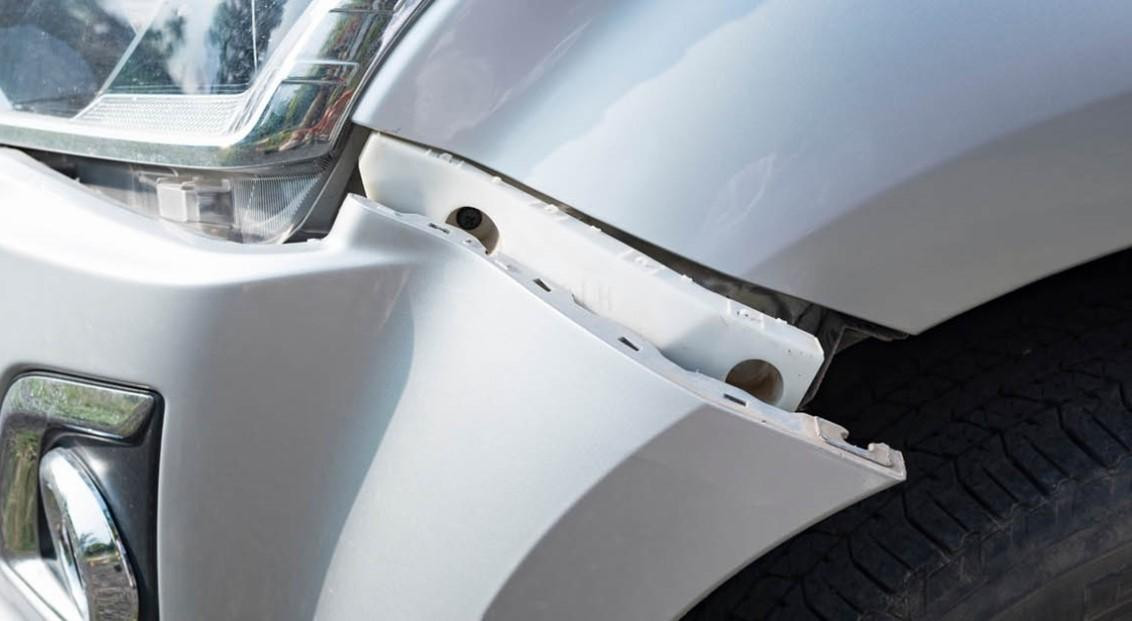
A bumper end on a 4-year-old vehicle has a small amount of damage to the lower side of the facia and a missing tab.
Your options:
1. Buy a new OEM bumper
2. Buy a certified aftermarket bumper
3. Buy the cheapest aftermarket bumper
4. Send the bumper to a sublet bumper repair facility
5. Purchase a used bumper cover
6. Repair in-house using heat welding and/or adhesives
Before you write your estimate, you need to print out the OEM’s bumper repair and paint procedures. Some new vehicles do not allow for the bumper to be refinished, so you will need to order a factory part.
Let’s look at the pros and cons of options one through five.
For the first four options, you will probably need to prime the bumper. This would be a non-included operation, labor plus materials. An adhesion promoter might be necessary prior to the application of primer, if the bumper is raw plastic -- another non-included operation. You need time to spray it, dry it and clean the spray gun.
Hint: read and print out the steps necessary for adhesion promoter, flex additive and primer from your paint line. You can use those to justify the non-included items.
For option one, there may be a core charge, which would result in additional cost for storage and credits.
For options one through three and five, you will need to dispose of the bumpers.
For options two and three, you should heat up the spray booth to allow any mold release material to rise to the bumper surface so it can be cleaned prior to painting. This also can be a non-included item. CCC allows up to 25% of the component’s base refinish time – a maximum of one hour -- which includes removal of mold release as outlined by the manufacturer, masking and application of adhesion promoter. A number of shops I deal with will heat the bumper in a spray booth for about 20 minutes, especially aftermarket covers, to bring the mold release to the surface so it will not affect the paint adhesion. Non-included items, as outlined by CCC, are correction of pre-existent surface imperfection and material costs. Also, you may need to trial fit -- another non-included operation.
For options one through three, a new part could be an availability issue.
Options two through five could have problems with ADAS systems working properly.
Let’s look at option six. Most shop owners and estimators see that broken tab and immediately replace the bumper on their estimates. There are a number of positives if the tab is repaired in-house with heat welding: faster turnaround, better insurance KPIs (repair vs. replace), less time and materials to paint, better control of the repair process, and the original factory installed bumper is on the vehicle.
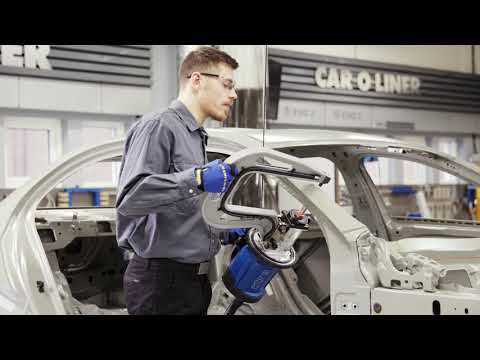
Heat Welding in Collision Repair
About 12 years ago, I started looking for tools and products at SEMA. I usually bought the tools and tested them. If they worked, I would write an article and/or do a presentation at a Society of Collision Repair Specialists (SCRS) open meeting and a Collision Industry Conference. A year later, Kye Yeung and I joined forces and we had a blast doing the presentations. Then COVID hit, and I had a kidney transplant. Everything stopped for three years. In that time, SCRS took over the Kool Tools of SEMA; I still contribute to the Educational Committee.
Last year, I saw a demo on bumper repairs. The instructor was using a Leister Triac-S heat welding gun instead of a nitrogen welder. I asked him if he was concerned with getting moisture at the weld site.
“I have been using this gun for 20 years and I have never had a failure,” he told me. He also said the temperature was more than 100 degrees centigrade. Water boils at 100 degrees centigrade, and the pressurized heated air would evaporate it. I purchased the unit, and I was able to repair a broken bumper tab the first time I used it.
A couple of months ago, I spoke with Kurt Lammon from Polyvance and he said he had a new hot air plastic welding station and would send one to me. If I liked it, he would make me a deal.
The thing that intrigued me was their cost. Both units are around $600, which would allow most shops to afford to get started on plastic welding. These tools are great for entry level apprentice technicians to learn how to repair bumpers.
I called Richie Kizirian from Jim and Jack’s Collision Center and asked if he had a young apprentice I could use to test out my idea. He gave me Anthony Certa. He does R&I work and he also moves cars from body to paint and back again. He had no experience doing bumper repairs. Anthony repaired two different tabs using both pieces of equipment.
How to Repair a Bumper with Heat Welding
I will outline the steps using both the Leister and Polyvance units.
First, the bumper needs to be washed with soap and water. Use dish soap instead of car wash soap, as grease and oil need a basic pH to remove grease. Follow with water-based wax and grease remover. Do not use lacquer thinner.
Make a pattern on the undamaged side of the bumper and cut it out.
Abrade the backside of the bumper using 80 grit DA. Perform an adhesion test to make sure the weld rod will stick. Clean with water-based wax and grease remover when finished grinding.
Select a bumper die from Polyvance’s bumper pliers kit that fits the slot with the corresponding pliers.
Sand both sides of the tab area with 80 grit sandpaper to remove the paint. Use low speeds so the plastic bumper tab area does not melt.
Apply aluminum tape to the bottom of the die and press in place. Use a wooden stick with spring clamps for added strength.
Apply a plastic welding rod to the area using the hot air torch.
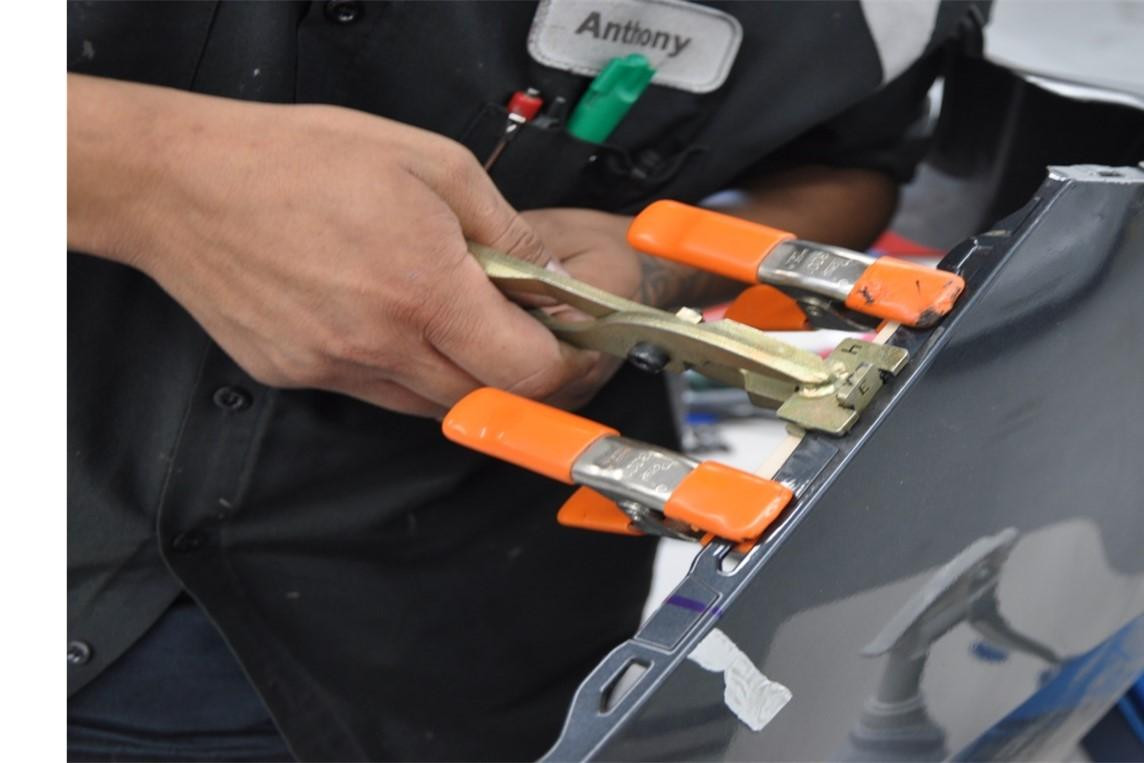 Certa uses the bumper pliers.
Before the melted plastic welding material solidifies, use the bumper pliers to reduce the thickness of the tab.
Check the shape of the tab with the pattern and shape to its original configuration.
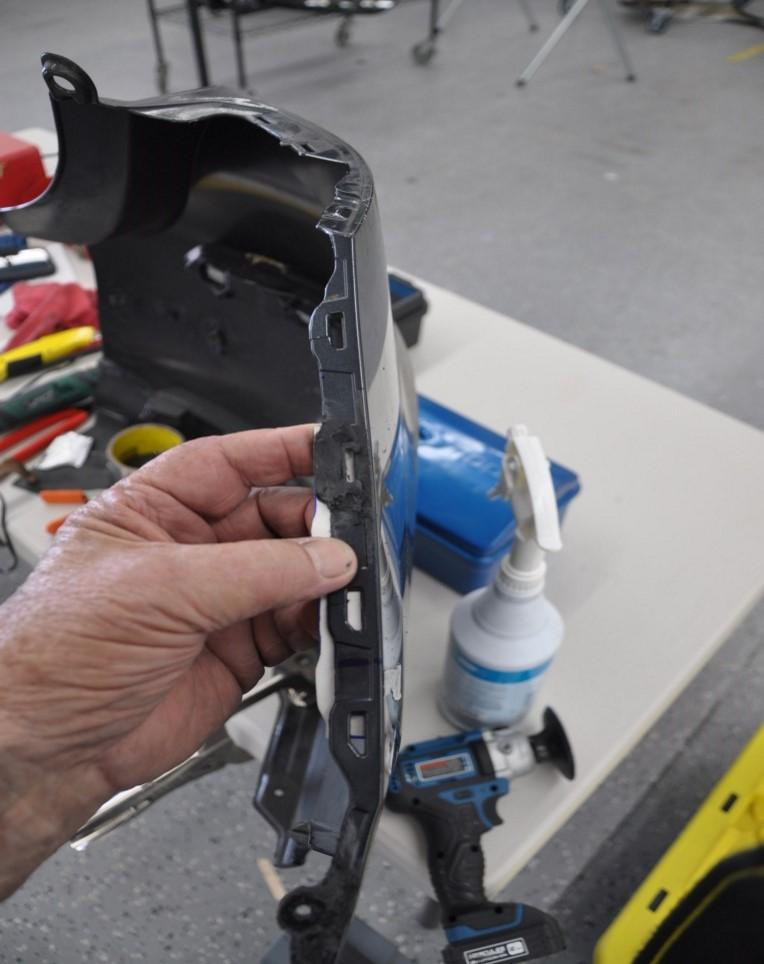 The fixed bumper.
The part is now ready for final sanding, priming and painting.
Whatever bumper repair system your shop is using, you will need the bumper plier set from Polyvance, the easiest and most efficient way to repair bumper tabs, period.
A couple of final comments on both pieces of equipment.
Polyvance’s is a small portable unit for entry level technicians and shops that want to repair bumpers in-house. This tool is not a replacement for a nitrogen welder. The unit performed as advertised. I received a first-generation unit, which had a problem with the heat gun at first. There are two magnets in the torch that must line up with the one in the box that turns the unit on and off. It turned out the holder was the problem. It did not hold the pistol properly, so I had to fiddle with it to get it to work. Kurt said they redesigned the holder and that would take care of the problem. They are sending me a new one.
The Leister heat gun is larger and slightly heavier than the Polyvance unit. It heats up much faster. It does not come with a hot iron.
I found one on Amazon that works OK, but it only has one heat setting. There is a knock-off of the Leister gun online, but comes with no guarantee and has to be sent back to Asia for repair. A shop owner bought that one and it lasted three months and died.